
The post is part of the Researcher’s Workflow; if you haven’t seen that post, check it out! Mendeley is an amazing tool when used to its full potential and is completely customizable to your research needs. At its barest, Mendeley serves an important tool to keep your sources organized and avoid any mistakes that may lead to plagiarism. At its full potential, it serves a crucial part of the research, development, and composing process! How do I use Mendeley? See the steps below.
1. Download and install Mendeley for free
Go to Mendeley’s website and download the desktop application for your operating system. Install the application.
2. Open your desktop version of Mendeley
3. Have Mendeley auto-organize your sources
Open the preferences for the application. Using the top tabs, select the “File Organizer” tab. It should look something like this:
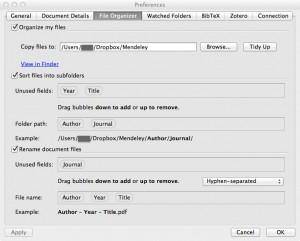
Make sure that all the boxes are checked, like in the image. Now have Mendeley organize your sources for you. Per your preferences, select which attributes (by dragging and dropping) you’d like Mendeley to name and store your files. These are what I chose:
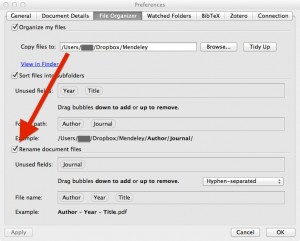
This means that when you import any sources (like PDFs) Mendeley will automatically re-name them and automatically organize them into folders. You only have to be sure that the citation information for the source is correct, and Mendeley will do the rest!
4. Save your Mendeley library to Dropbox
Do to do this, make sure that you have a Dropbox account and have downloaded the Dropbox desktop application (so that your Dropbox folder appears as a location on your computer’s hard drive). If you are unsure how to do this, see this post.
Add a folder named Mendeley to your Dropbox and select it as the location of your library, by using the Browse… function. Once this is set, your Mendeley library is automatically backed up to the cloud (via Dropbox) so you don’t have to worry about any computer mishaps. Additionally, it makes it accessible to other devices, which is important if you are using my Research Workflow.

5. Set up auto-import
Select the “Watched Folders” tab.
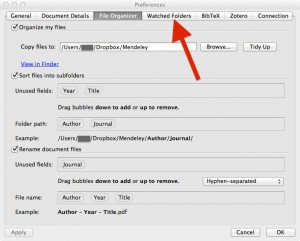
Check any folder which you would like Mendeley to auto-import files from. For me, the best way to do this was to set up a dedicated folder on my hard drive called “Academic Papers for Import”. I would then save any file (usually PDFs) to it, and Mendeley would then automatically import and organize my new sources for me.
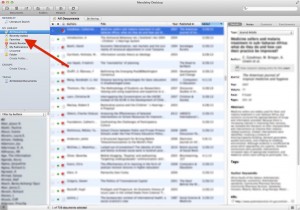
6. Add files to Mendeley
To do so, either use the auto import function (see step 5) or manually add files via the icon on the top left of the screen.

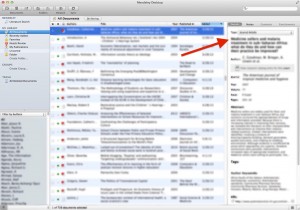
7. Add any missing citation information
Mendeley will automatically add any citation information it has for your imported file. However, sometimes the citation information can be missing or incorrect, so use the area to the right of the screen (when a file is selected) to edit that information.
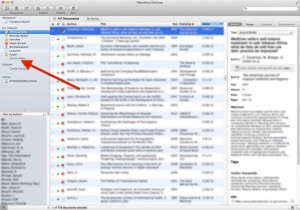
8. Discover and utilize tags, stars and folders
How you use tags, stars and folders is up to you. Mendeley gives you a number of useful options for organizing your research. Play with these options and see what works for you. Starring an item automatically places adds it to the “Favorites” category on the left.
Folders allow you to organize your sources in any way you wish, from individual paper sources, to topic areas. It’s up to you.
9. Add Microsoft Word integration
This step is key! (And quite possibly the most useful part of Mendeley!) To add the Microsoft Word Plugin, open the “Tools” option at the top of the page and select “Install MS Word Plugin”. This plugin allow you to add your citations to your paper as you write, then automatically created a works cited page at the end. For more information on how to utilize this option, please see the Researcher’s Workflow.
Have any tips or tricks to using Mendeley? I want to hear from you. Please comment below!